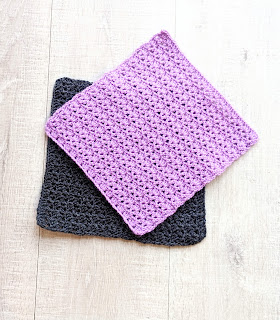
How to crochet a trendy top
Welcome to my blog! 💖
If you’re looking for a stylish yet simple crochet project to add to your handmade wardrobe, you’re in the right place. ✨ This crochet top tutorial is perfect for beginners who want to create something modern, wearable, and fun.
In this step-by-step guide, I’ll walk you through how to crochet a top that’s ideal for layering in spring and autumn, yet light and breezy enough to wear during summer.
👉 For better understanding, you can also follow along with my YouTube tutorial here: Watch the full video tutorial on YouTube.
✨ Why You’ll Love This Crochet Top
This beginner-friendly crochet top pattern uses simple stitches, making it the perfect choice if you’re new to crochet or just want a quick DIY fashion piece. By the end, you’ll have a trendy crochet top that’s not only comfortable but also completely handmade by you!
Whether you’re making it for yourself, as a gift, or as a fun practice project, this crochet top is a must-try.
So grab your yarn and hook, and let’s get started on your new favorite wardrobe piece. 🧶
📏 Finished Size
-
Width: approx. 35 inches (adjustable by adding/removing rows or motifs).
📺 Need help? Watch the step-by-step instructions on my YouTube channel: Crochet Trendy Top Tutorial.
🧶 Materials Needed
-
Double knit (DK) cotton yarn
-
4 mm crochet hook
-
Yarn needle (for weaving ends)
-
Scissors
🔤 Abbreviations (US Terms)
-
ch = chain
-
dc = double crochet
-
sl st = slip stitch
-
sp = space
-
rep = repeat
🪡 Front Panel
Foundation Round:
Ch 4. In 4th ch from hook: 3 dc, ch 2, 3 dc in same ch, ch 2, 3 dc in same ch, ch 2, 3 dc in same ch, ch 2. Sl st into top of beginning ch-3 to join. (4 clusters of 3 dc)
Round 2:
Ch 2, 3 dc, ch 2, 3 dc into next ch-2 sp. Rep around. Join with sl st to ch-2.
Round 3:
Ch 2, skip 3 dc, 3 dc in next sp; (3 dc, ch 2, 3 dc) in next ch-2 sp. Rep around. Join with sl st.
Rounds 4–15:
Rep Round 3. Fasten off.
👉 At this stage, the length is complete. Next, we’ll work on the width.
📏 Extending the Width
Row 1:
Join yarn at one corner. Ch 2, 3 dc in same sp, skip 3 dc, 3 dc in next sp. Rep across.
Row 2:
Ch 2, skip 3 dc, 3 dc in next sp. Rep across.
Rows 3–8:
Rep Row 2. Fasten off.
➡ Repeat on the opposite side of the panel (8 rows).
📺 Confused at this step? Don’t worry! Watch me explain it clearly on YouTube: Crochet Top Tutorial Video.
🪡 Back Panel
Make the back panel exactly as the front panel, following the same instructions.
🎀 Straps (Make 2)
Row 1:
Join yarn at the top of the front panel, leaving 7 rows from the side. Ch 2. Skip 3 dc, 3 dc in next sp; skip 3 dc, 3 dc in next sp; skip 3 dc, 3 dc in next sp.
Row 2:
Ch 2, turn. Rep Row 1.
Rows 3–32:
Rep Row 1 until strap reaches desired length. Fasten off.
🧵 Assembly
-
Attach straps to the back panel, leaving the same number of rows from each side to align with the front panel. Use single crochet or whip stitch to secure.
-
Join the front and back panels at the sides using single crochet or your preferred seaming method.
-
Weave in all ends.
✅ And that’s it! You’ve created a stylish, beginner-friendly crochet top that’s perfect for layering in spring, autumn, or wearing alone in summer.
📺 For a complete walk-through, watch my YouTube tutorial here: Full Crochet Top Tutorial.
💖 Support My Crochet Journey
If you enjoyed this free pattern, don’t forget to subscribe to my YouTube channel – Rania Crochet Guide for more tutorials, tips, and short videos. Every subscription helps me keep creating free content for you!


Comments
Post a Comment